 This Is Not A
BLOG!
Date: 11/05/19
Totally (Re)wired
Part One - The Revenge Of The Daddies Sauce
No, I didn't have a restful Bank Holiday weekend, seeing as you mentioned it.
It was all going to be a bit of a chill-out, what with my having booked the Tuesday off as well. I had intended to continue with my latest Great Winter-Oh-Shit-Where-Did-Spring-Come-From Project™...
Hell! I'm going to have to tell you about that first, aren't I?
OK, well recognising that I needed something to occupy my weekends and evenings during the winter - otherwise I would vegetate and be going to bed through ennui before 8pm every night and spending Saturday and Sunday afternoons napping on the sofa - I had decided that the skirting boards and doorframes upstairs needed re-painting. They hadn't been done in fourteen years anyway, and various portions of my previous GWP had caused a certain amount of damage and deterioration.
In any case, winter is the best time for doing jobs like painting, because you can leave the windows open (fumes, dispersal, for the use of) without half the insect kingdom coming in and fusing itself to the décor.
So sometime in November, I set to it. Progress was pretty swift, even taking into account the First Law of Paintbrushes, which decrees that - no matter how well you clean them - after about two sessions of use, you might have better luck trying to paint with a Shredded Wheat®.
(The more sharp-eyed of you will noticed that I haven't mentioned the doors themselves. J had no intention of going near them with the gloss. This wasn't because they didn't need doing, but just that I knew I wouldn't really have time, and that they were better left for next winter, when I would again be at a constant loose end outside of the customary pastimes of eating, sleeping and - despite myself - working in the pickle factory).
By early January I had finished the boards and frames, and so I turned my attention to the stairs; or, more specifically, to the banisters and skirting boards thereupon.
And here was where it got complicated.
The banisters were certainly in a bit of a mess. Wear down the years meant that the paint had worn through in places, and they looked really rather tatty. My original intention of simply doing what I had done with the rest, i.e. roughing them up with sandpaper and putting a fresh coat of white gloss on, wasn't likely to work well here. This was because my sainted mother, in an access of trendiness some thirty years ago, had decided that it would be a good idea to re-paint them in what was laughingly called 'wood-look' paint; and that, furthermore, it would be a sound notion to apply this over the top of the existing coat of white.
The overall effect of this was that, a) it didn't look like wood at all, merely as if someone had gone up and down the banisters with a catering-size bottle of Daddies Sauce, and b) that it wouldn't have even looked like wood in the best of circumstances, unless one were to go along it etching a grain effect into it.
But the third, and most pressing, effect was that, when the two coats of white which had since been applied over the 'wood-look' (one by my mother, who had realised that her attempts to be with-it had not really worked out, and one by myself in 2004) wore down, through poked the dark brown. Not a pleasing effect at all.
It therefore became clear that the only way to tackle the problem was by taking everything back to the bare wood. I still had my brother's hot-air gun from Stage One of my fettling-mania, and so firstly I set forth with this, setting off the smoke alarms (somewhat inconveniently for the purpose of this exercise situated in the hall and on the landing, where they were ready primed and waiting for the first sniff of melted polyurethane) at regular intervals.
I got as much as I could get off with the deadly heat ray, but there was some stuff which wouldn't come off no matter how I scraped at it. This was mostly the brown sauce, but also the layer of white beneath it which - unsurprisingly given its age - was clearly lead-based judging by the thin layer of green which was exposed by the whole process. Gouging the remainder out, as I had had to do with the stair treads themselves, was not an option because it would leave a highly unsatisfactory series of grooves on what is supposed to be a smooth surface.
That left nothing for it but sandpaper. Lots of sandpaper. I bought two fresh rolls of 40-grit from Screwfix and set to the newel posts. Now, the knobs on the top of these are not particularly elaborate, but are both globular and feature two grooves around their circumference. These grooves - and their equivalents on the base of the knobs - proved too narrow both for the scraper to have any effect and for them to be feasibly get-at-able with the sandpaper. This left a rather scraggy compromise which meant that I hoped the new coat of paint, when finally applied, would cover any significant sins of omission.
Now the handrail itself is, in profile, shaped a bit like an Ωmega, and I found that I probably had more chance getting Into The Groove with Madonna than I did of getting Into the Grooves with Mascrapa, but bloody-mindedness was my constant friend, and I managed to get it into sufficient shape for it to be satisfactorily covered by the paint in due course.
Faced with the top of the handrail, I had An Idea. This is usually a bad sign. "Ah!", I thought, "I still have the belt sander that I used for the floors!". So I fished it out, changed the belt and set (carefully) to tackling the rail. This worked pretty well, although I may have slightly flattened the profile in doing so. The bit nearest the newel post at the bottom was out of reach of the belt when using it in the longitudinal mode, so I decided to have a go at it across the top. Well, this certainly took the remaining residue off, but it also left a noticeable dip in the surface about four inches up from the post. I have rationalised my failure with the comforting thought that - should I be going up and down the stairs in the dark (which I usually do) - I will be able to gauge where I am by touch.
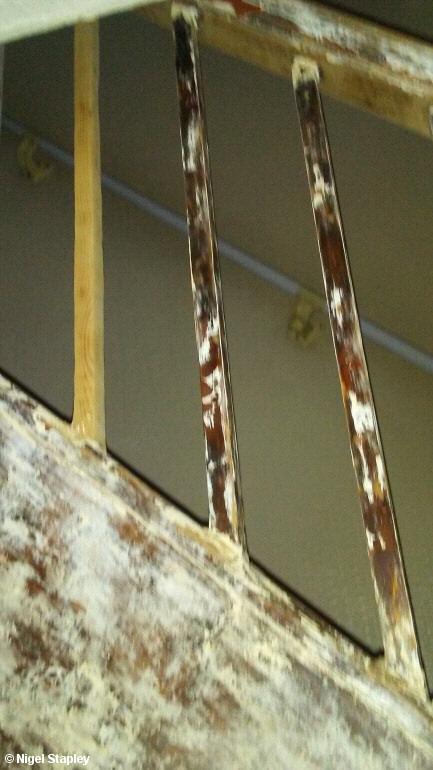
Leaving the hall side of the handrail for a later phase, I then turned my attention to the spindles. These are square in section, and there are seventeen of them (there may have been eighteen or nineteen at one time, but the top one or two seem to have been removed at some point in the past). It was at this stage that an unavoidable difficulty arose. The top couple of feet of the banisters run parallel to the side of the hall ceiling, and so it's fiendishly difficult to get at anything in that region. But the attempt had to be made, and I sat on the stairs in order to set to the spindles with the sandpaper using my semi-blunt scraper as a mirror so that I could see what I was doing on the hall side. Each spindle took between forty and fifty minutes to do, and I was often hampered by the way the grain on some of them held the dirt and dead paint. Slowly, one or two at a time during the spring evenings, I worked my way down. This will give you some idea of what I was up against (an 'after' and 'before' in this case):

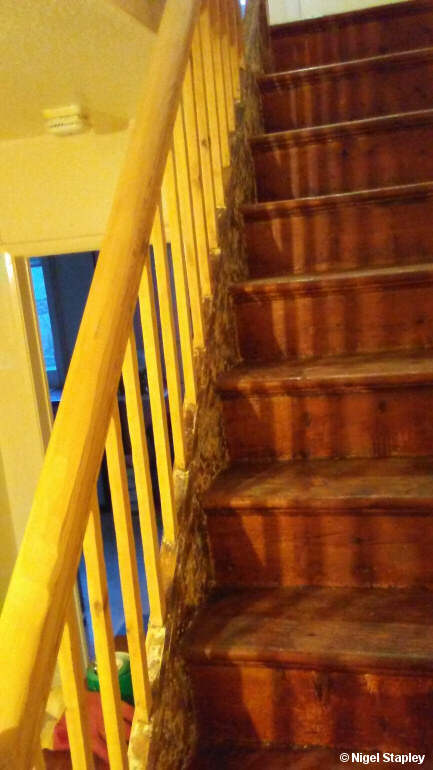
It took a couple of weeks or more working at odd hours in the evenings and weekends, but finally they were all done. And pretty good it all looked, I thought:

I then set about the base of the spindles. As you can see in the above shot, this were a lot darker and dirtier, but the fact that the stretches between the spindles were short (excepting the topmost one for reasons already disclosed) and that I could sit on the stairs and have at them without hindrance meant that that part of the job took only a few evenings.
The outer part of the handrail, that is, the length of it on the hall side, was always likely to be a slog because of the grooving and the constricted space towards the top, but I persevered and eventually achieved something resembling a decent result.
That left the panel which runs up the side of the hall (seen in the first picture). This was covered in the white and brown paint residue against which both the heat-gun and the scraper had proven unequal. Now, I had had an experimental bash at the lower part of it with the belt sander, but that beast is a heavy one to handle even when on a completely horizontal surface, so it was scarcely to be wondered at that my attempts to hold it vertically in any effective way were doomed.
So, back to the sandpaper. Scrape, scrape, scrape (and not just the paint either; I had worn my way through the thumb and forefinger of the right hand of a pair of synthetic gloves kindly given to me by a neighbour some years ago, and I only realised that the wear was spreading when I found that I had removed the skin from the tip of the second finger of my right hand as well. I know that some people have a fetish about applying sandpaper to other parts of their anatomy; I never understood the attraction before, and I sure as hell don't understand it now).
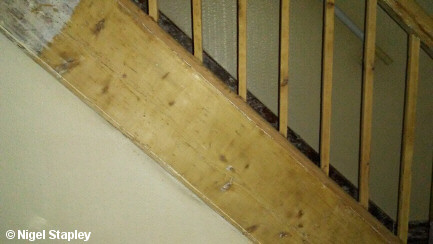
You can see the contrast of the work in progress here:

In all honesty, this was perhaps the easiest part of the job as far as getting the crap off was concerned, and it was coming up very nicely. However, there was that problem with the upper reaches and its annoying contiguity with the wall. This meant not only getting out the stepladder to deal with the higher part of the panel (which I would have to have done anyway), but having to reach up to try to get some sort of purchase on it without banging my head on the hall ceiling. Bloody-mindedness again coming to my aid, I had a determined go at it the Saturday before last, and finished it as best I could.
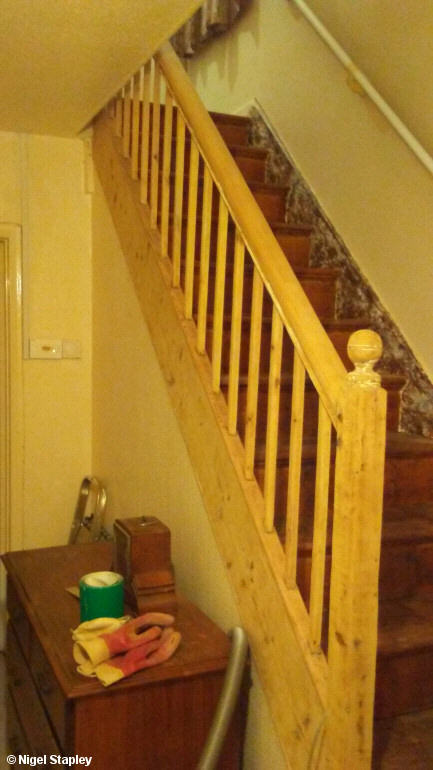
Scrubbed up quite well, I thought:

Inordinately proud of my efforts, I looked forward to starting on the sanding of the skirting boards up either side, where there is a lot of white residue to kill off.
At which point, I was interrupted. Which is what I am about to do to you, m'dears. Part Two to follow...
File under: Me


 This Is Not A
BLOG!


